Behind every successful wooden furniture restoration are hours, days, or even weeks of meticulous and dedicated woodwork. They may look easy on professional online videos but only a few of them explain every critical decision that goes with every step.
Antique furniture is the first thing that comes to mind when we talk about wood restoration. Because of its high deemed value, it is important that every part and details of the piece if brought back as close to its original look and condition as possible. To achieve this, one of the utmost considerations is avoiding critical mistakes that could significantly reduce the furniture's value and could lead to project failure.
Here are 7 common mistakes in antique wood restoration that we need to be aware of:
-
Failing to assess the furniture's worth
A costly step in wood restoration is not knowing the true value of the antique furniture before starting the work. Skipping this step and proceeding right into stripping and sanding might lead to decisions that could significantly reduce the worth of the piece.
For example, you might inadvertently sand off some precious labels or markings on some hidden surfaces and lose any reference to the wooden furniture's origin, age, or make.
Failure to assess a wooden antique's value could also lead to poor decision-making on whether to paint or refinish the piece. Some wooden antique pieces are too valuable to be coated with paint and should be stained or refinished instead.
Be on the safe side. If you suspect that a wooden antique furniture is high-valued, consult a restoration professional and have it assessed.
-
Failing to do the necessary repairs
The right time to make the needed repairs on a wooden antique is right after stripping and before the sanding and staining process. So go ahead and replace broken screws and knobs at this point. Repair cracked sides or lopsided drawers and reattach broken joints.
It's also the perfect opportunity to fill in holes with like-colored putty. Doing the repair after the refinishing or painting stage might adversely affect the finish, while doing it right before the stripping stage might unnecessarily strip any fresh wood or ruin the other materials that may be used.
-
Failing to clean thoroughly
Going straight ahead into the refinishing or painting process without cleaning the surface well could lead to a significant waste of time and effort and might affect the wood's finish. You surely do not want some dust or cobwebs to get stuck in a varnish or paint. This could surely result in a crude and imperfect finish.
When that happens, you will have to repeat the process of stripping, sanding, and staining, which would have been avoided in the first place. This is one of the most taxing mistakes in antique wood restoration project. It's a good idea to take your time and carefully go through the process than to rush it only to repeat most of the steps.
Remember to clean up the wooden antique right before the refinish stage. Here are some simple proper ways to do it:
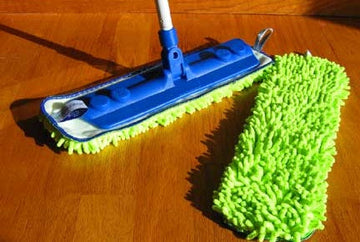
- Apply or spray a good wood cleaner on the surface of the wooden antique and remove loose or stubborn dust or dirt with a rag (or a toothbrush on the wood's intricate details, if any). Find a trusted wood cleaner in a specialty store near you or online, or you can make one yourself.
- Wipe the surface down with a damp cloth to absorb any remaining dirt.
- Wait for it to dry off before starting the refinishing or painting process.
-
Failing to sand properly
This mistake covers two concerns: a) skipping the sanding process and b) not using the correct sandpaper.
Not sanding the wooden furniture right before applying stain could result in a rough and imperfect finish. Precious wooden antiques are expected to have a high level of craftsmanship. It is important that such quality is preserved during the restoration process in order to maintain its value. Sanding ensures that the surface is smooth and with no unpleasant bumps or uneven patches when you run fingers through it.
But more than just sanding, it's also critical that we use the right grit of sandpaper for the specific sanding job.
Know when to use manual sandpapers and when to use mechanical ones. For certain surfaces, sandpaper can be wrapped around a sanding block.
Using the wrong grit size of sandpaper can cause permanent damage to grain patterns, while not using the proper technique in sanding for a specific purposes could ruin the delicate components of the furniture such as curves and fine details.
Lastly, it's also important to sand the wood with a finer grain sandpaper after each layer of paint or varnish. This will ensure that the next layer of paint or varnish can be easily applied on the fresh surface.
-
Failing to let the varnish or paint dry
Varnish is a protective layer on the wood designed to shield it from the damaging elements of the environment such as heat, dirt, and moisture. For it to work its purpose, you must allow it to dry completely before using the furniture.
Whether you decide to stain the wooden antique to maintain its natural look, or paint it give it a renewed appearance, it's ideal to coat it with a protective film such as varnish.
Remember to give each application of paint or varnish enough time to dry. You must have seen at least one piece of varnished or painted wooden furniture that had thick lumps on its surface. That's the result of premature application of paint and varnish. They don't look attractive at all.
-
Not choosing the right workplace
In choosing a place for wooden restoration works, it's important that the area is spacious and well-ventilated. Paints and varnishes have such powerful smell and can have suffocating effects. Make sure the room has at least plenty of open windows with freely-flowing air coming in and out.
Don't make the mistake of working under a direct sunlight just because you don't have an available room that's well-ventilated. The sunlight might prove too intense for drying purposes that the piece might end up with a ruined look. Always choose a space with enough shade and ventilation.
-
Failing to ensure safety
One of the common mistakes in wooden antique restoration is ignoring safety precautions before carrying out the task. This may lead to a successful project but also accidents or a compromised health.
Human health and safety should be the topmost consideration in any restoration project. When both are preserved, you can have more and exciting opportunities to restore vintage pieces such as antique wooden furniture.
Use the following protective gear when inside a restoration workshop:
- Long-sleeved clothing as protection from harmful chemicals such as paints and varnish
- Safety eyeglasses
- A facial mask
Any wood restoration work is a focused process, especially for valuable pieces. Have the presence of mind in every step to avoid costly mistakes in antique wood restoration. Don't rush the job. This will ensure the success of the project.

