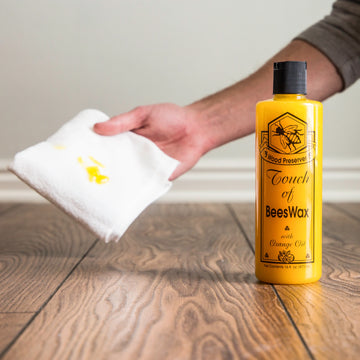
Restoring wood furniture was long known to be a professional job, until the internet and social media paved the way for useful information sharing. Thanks to technology, getting access to practical tips on wood restoration has become easier for all furniture owners or amateur restorers.
Wood is a precious natural material, and a good wooden furniture is worth saving from damage or dullness. When we wee the potential beauty of a wooden piece beyond its aged and lackluster appearance, we may not need an expert restorer to bring it back to life and set it to its original function.
Below is a compilation of 8 easy steps meant to guide amateurs in restoring wooden furniture.
-
Research and assess the furniture's value
It helps to ask around and do some research to determine the value of the furniture you want to restore. Check for its origin, age, or the type of craftsmanship through the marks or labels it may possibly bear. If these marks exist, take photos for record purposes.
Then, have the item assessed by a professional, especially if you suspect that it has a significant value. It's important to undergo this step before starting any work. Remember that stripping or sanding a potential collectible's surface before knowing its exact value could reduce its worth.
These days, it can be possible or even easy for restoration newbies to look for some telltale signs of age.
a. Feel underneath for dull interior corners.
b. Partially loosen a screw and examine its threads. If they have uneven widths between them, it's a sign that the furniture is old or may even be an antique.
c. Pull out a drawer (if any) and check if it has dovetail jobs. Dovetail joints are among the earliest known techniques in woodwork design. If you see it in your wooden piece, there's a chance that the furniture is old and is probably a collector's item too.
d. Confirm your own findings with a professional antique appraiser.
-
Set aside a budget
The budget amount for restoring a wooden piece of furniture is relative to its appraised value and its condition status. With an amateur's growing interest for restoring wooden furniture, it seems easy to jump right into restoration work whenever he sees a piece that needs rework. But if the piece isn't valuable, a complete or expensive restoration might not be worth the time and effort.
Always consider what level of restoration would you need or if you need to go through it at all. Is it a rare item? Or is the exact same item widely available, which will cost you less by buying a new one?
A few simple fixes may be enough for certain pieces but some projects might cost way more than you can afford. Take the time to review these important factors and consult an expert when needed.
-
Decide on the look
Restoring wooden furniture means rebuilding the piece as much as possible to its original state.
The passage of time may have altered not only the wood's finish but also its color. To find out its original grain's color, look for and examine the part of the furniture that has been shielded from everyday exposure and use, such as the bottom side of the drawer or the back side of its front.
-
Gather the tools
Listed below are some of the basic tools needed for a restoration project.
a. Sanding Tools: Get a variety of sandpaper at the specialty outlet, from the medium rough (80 to 120 grit) to extra fine grit (300 to 600). Depending on the wood's surface, a sandpaper can be held in the hand or wrapped around a sanding block.
b. Scrapers: Get a good putty knife (both the plastic and metal) and a pull scraper. A pull scraper can quickly remove old paint or finish. Just be sure to keep these scrapers sharp at all times as their blades get dull fairly quickly. Also ensure that a smooth-cut file is available for this purpose.
c. Hammers: You will need a 13-ounce claw hammer (which is easier to swing than the commonly bought 16-ounce hammer) and a rubber or wooden mallet. The soft faces of a rubber or wooden mallet are good for driving chisels and can tap wooden furniture parts into position without leaving a mark.
d. Screwdrivers: A Philips-head and an assortment of flathead screwdrivers are needed for tightening joints and securing the wooden components in place.
-
Be mindful of your safety
Safety should be of utmost importance for an amateur in a restoration project. The following protective gear should be worn to shield your from harm in the workshop.
a. Long-sleeved clothing as protection from harmful chemicals such as paints and varnish
b. Safety eyeglasses
c. A facial mask
-
Clean the wood
Before subjecting the wood to some stripping and scrapping, give it first a nice cleanup. With a good wood cleaner, remove any layer of clingy dirt or grime that may be stuck on the wood's surface or its intricate details
Either spray the cleaning solution on the wood or dip a cloth in it and give the wood a good scrub. Use a soft toothbrush to get into the hard to reach areas and then dislodge the stubborn dirt.
-
Make the necessary repair
The easy parts of repairing on wooden furniture include tightening the screws on wobbly desks and chairs, joining breaks with wood glue, and filling slight cracks with same-colored putty.
The challenge appears when a key part of the furniture is broken beyond repair or is missing. Unless an identical part is found or available somewhere or you can make the exact same part yourself, it will have to be custom-made as can be the case for a chair's detailed arm or drawer's antique knob.
Consider how far you can go in achieving integrity in your restoration.
-
Refinish or paint
Among the critical decisions involved in wood restoration is whether to refinish or paint the furniture.
Refinishing a wooden piece can be a more taxing process than painting. It involves removing the old finish, sanding, re-staining with another color, and varnishing (which alone can be as costly as painting). There is also a slim guarantee that you will achieve the same result as you were going for. If you will go for this option, you will have to be very patient, careful, and take time to minimize mistakes.
A valued piece is worth refinishing, though as painting it could reduce its value. If the piece is not worth all the trouble of staining, go paint its surface.
Regardless of your decision, give it a thorough cleaning after the old finish is stripped off, then sand it properly to achieve a more flawless finish.


